Written by: Paul
There’s a common moment of panic for every smartphone owner: you plug in your phone, but nothing happens. The battery icon stubbornly refuses to show a charging symbol, and you’re left with a sinking feeling. While this can sometimes signal a serious hardware issue, more often than not, the problem is simpler and easier to fix than you might think: a dirty charging port. Over time, lint from your pocket, dust, and other tiny debris can accumulate inside the port, blocking the connection between your phone and the charging cable.
As experienced mobile device repair specialists at iGenius Phone Repair, we’ve seen countless phones with this exact issue. Before you rush out to buy a new charger or book a repair, there are effective and safe ways to clean your charging port at home. This guide will walk you through the process step-by-step, providing you with the knowledge to safely fix a bad connection and get your phone charging again.
This information is provided for educational purposes only. Always exercise caution when handling your device, as improper cleaning can cause damage. If you are not confident in performing these steps, we highly recommend seeking professional help.
The Culprit Behind a Bad Connection
Understanding what causes a bad charging connection is the first step to fixing it. The most common cause, by far, is the buildup of foreign material. Your phone spends a lot of time in your pocket, bag, or purse, and these are often filled with tiny particles of lint and dust. These particles are pushed into the charging port every time you plug in your cable, gradually compacting at the bottom of the port and preventing the charger from making full contact with the internal pins.
While lint and dust are the main culprits, other issues can also cause charging problems. These include physical damage from dropping the phone, water damage that corrodes the port, or a faulty charging cable. According to a CNET article on fixing charging issues, a dirty port is one of the most common reasons a phone won’t charge when plugged in, confirming that this is often the easiest and most cost-effective first step. You can read more about this topic in the CNET article here.
The Right Tools for a Safe Job
Before you begin, it’s crucial to gather the right tools and take the necessary precautions. Using the wrong tools can easily damage the delicate internal pins of your phone’s charging port, turning a simple cleaning job into a costly repair.
Tools You Should Use:
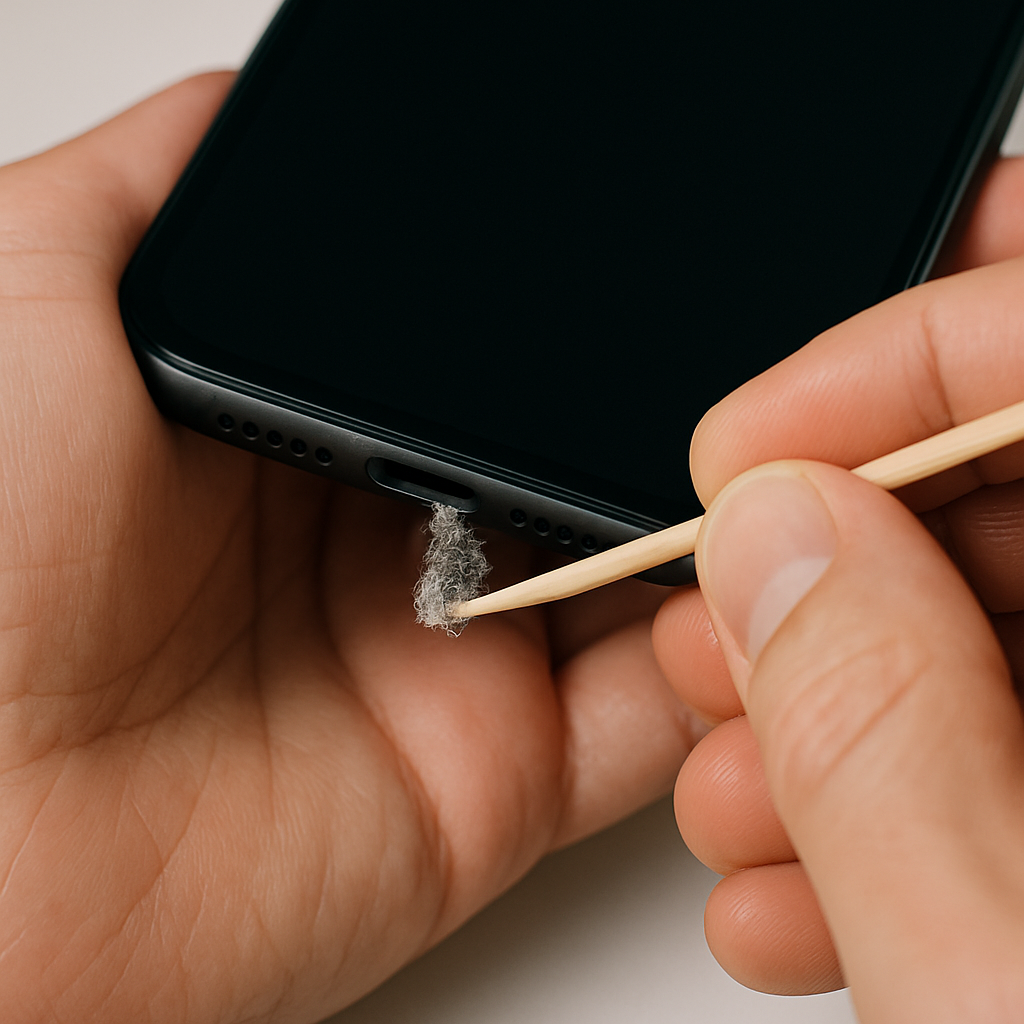
- A wooden or plastic toothpick: These are non-conductive and soft enough not to scratch or damage the port’s metal contacts. A wooden toothpick is the safest option.
- A small brush: An anti-static brush or a new, clean toothbrush with soft bristles can be effective for gently sweeping away loose debris.
- A can of compressed air: This can be useful for blowing out loose dust. However, you must use it with extreme caution and never spray it directly into the port for an extended period, as the rapid cooling can cause condensation.
Tools You Must AVOID:
- Metal objects: Never use a needle, paper clip, or any other metal object. These are highly conductive and can easily short out the charging port or scratch the internal pins, leading to permanent damage.
- Water or other liquids: Using liquids to clean the port is a high-risk activity that can cause water damage and corrosion.
A Step-by-Step Guide to Cleaning Your Charging Port
Follow these steps carefully to ensure you clean your phone’s charging port without causing further damage.
- Power Down Your Device: The first and most critical step is to turn off your phone completely. This eliminates the risk of short-circuiting the device if you accidentally touch the internal components.
- Use a Flashlight to Inspect: Shine a small flashlight or a phone’s torch into the charging port. You will likely see a compressed layer of lint and debris at the bottom.
- The Toothpick Method: Hold the phone securely. Using your wooden toothpick, very gently scrape along the inside walls of the port. The goal is to hook and pull out the compacted debris. Do not apply force, and avoid poking directly at the pin connector in the center. Work slowly and carefully, pulling the lint out in small pieces.
- The Brush or Compressed Air Method: Once you have removed the major clumps of lint, use a soft brush to sweep out any remaining loose particles. If you’re using compressed air, give it a few short, controlled bursts from a distance of at least 6 inches. Do not hold the nozzle directly against the port.
- Test the Connection: After cleaning, turn your phone back on and try plugging in your charger. It should slide in more easily and make a firm connection. With a bit of luck, your phone will begin charging immediately.
What to Do If Cleaning Doesn’t Work
If you’ve followed the steps above and your phone still won’t charge, the problem is likely not simple debris. The issue could be a faulty charging cable, a bad battery, or, more seriously, a damaged charging port or a problem with the phone’s internal logic board. These are not DIY fixes.
Attempting to repair these components yourself can void your warranty and cause irreversible damage. At this point, the safest and most reliable solution is to seek professional help. Our technicians have the expertise and specialized tools to diagnose and fix complex hardware issues, from replacing a broken charging port to repairing a damaged logic board. For more information on our professional services, you can visit the homepage of iGenius Phone Repair, where you can learn about our commitment to quality service.
If you suspect your charging port is physically damaged, or if your phone shows signs of water damage, do not attempt to force a connection. This could cause a short circuit. Instead, visit our repair a device page to schedule a professional diagnosis.
FAQs
Q1: Can I use rubbing alcohol to clean my phone’s charging port? A1: We do not recommend using rubbing alcohol. While it evaporates quickly, it can still leave residue or damage the internal components of the port. The safest method is to use dry, non-conductive tools.
Q2: My phone is still not charging after cleaning. What’s wrong? A2: If cleaning did not solve the issue, the problem is likely a hardware failure. This could be a broken charging port, a faulty battery, or damage to the internal logic board. You should take your phone to a professional repair service to get a proper diagnosis.
Disclaimer The information provided in this post is for educational purposes only and should not be considered professional advice. Please consult with a licensed professional before attempting any repair. The use of these tips is at your own risk. iGenius Phone Repair is not responsible for any damage to your device that may result from following the steps outlined in this article.